Presets for Lightroom are pre-defined settings that enhance and transform your photos with just one click. This guide shows you how to import these presets into Adobe Camera Raw via Adobe Photoshop and adjust them as needed.
-
Open Adobe Photoshop
Launch Adobe Photoshop and open an image.
-
Convert Layer to Smart Object (Optional)
Right-click on the layer in the Layers panel. Select “Convert to Smart Object”.
Why should you do this? Converting a layer to a Smart Object in Photoshop allows you to apply filters, like the Camera Raw filter, non-destructively. This means you can adjust the filter settings at any time without permanently altering the original layer. This is particularly useful for maintaining flexibility in your editing workflow.

-
Access the Camera Raw Filter
Navigate to the top menu and select
Filter > Camera Raw Filter.
-
Open the Presets Panel
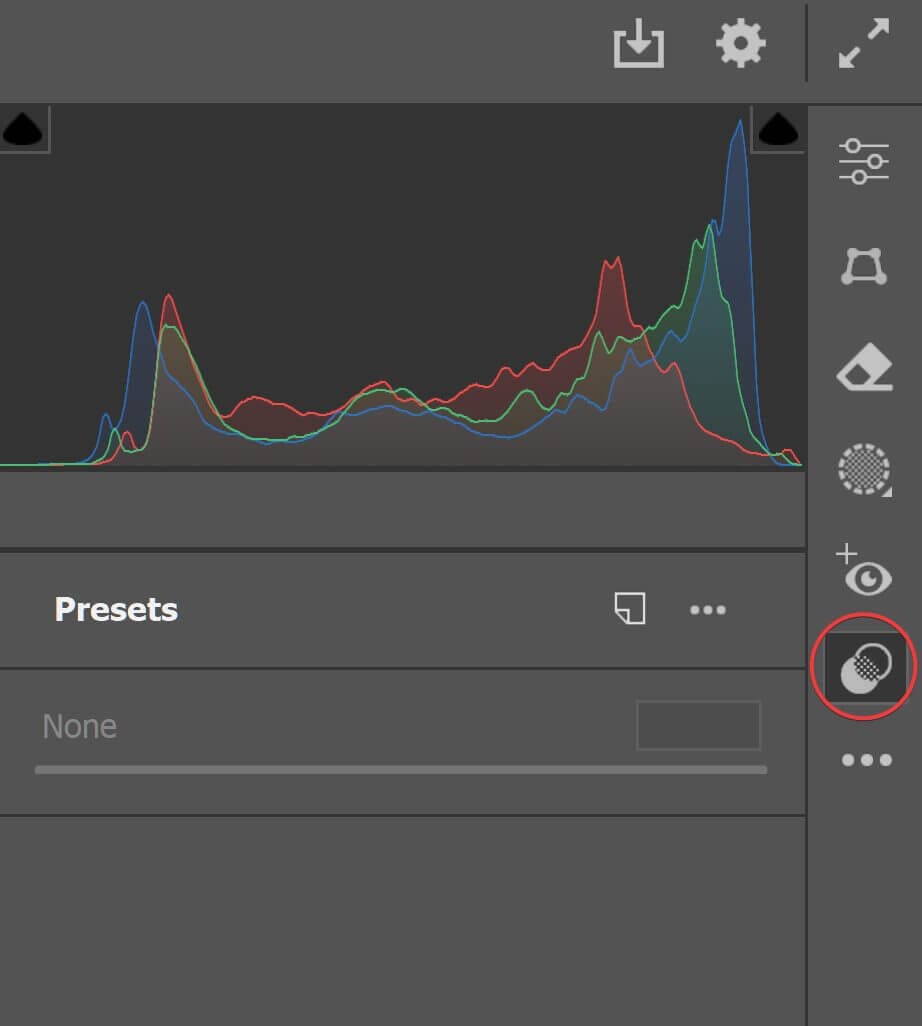
Click on the “Presets” icon on the right-side of the interface.

-
Import Presets
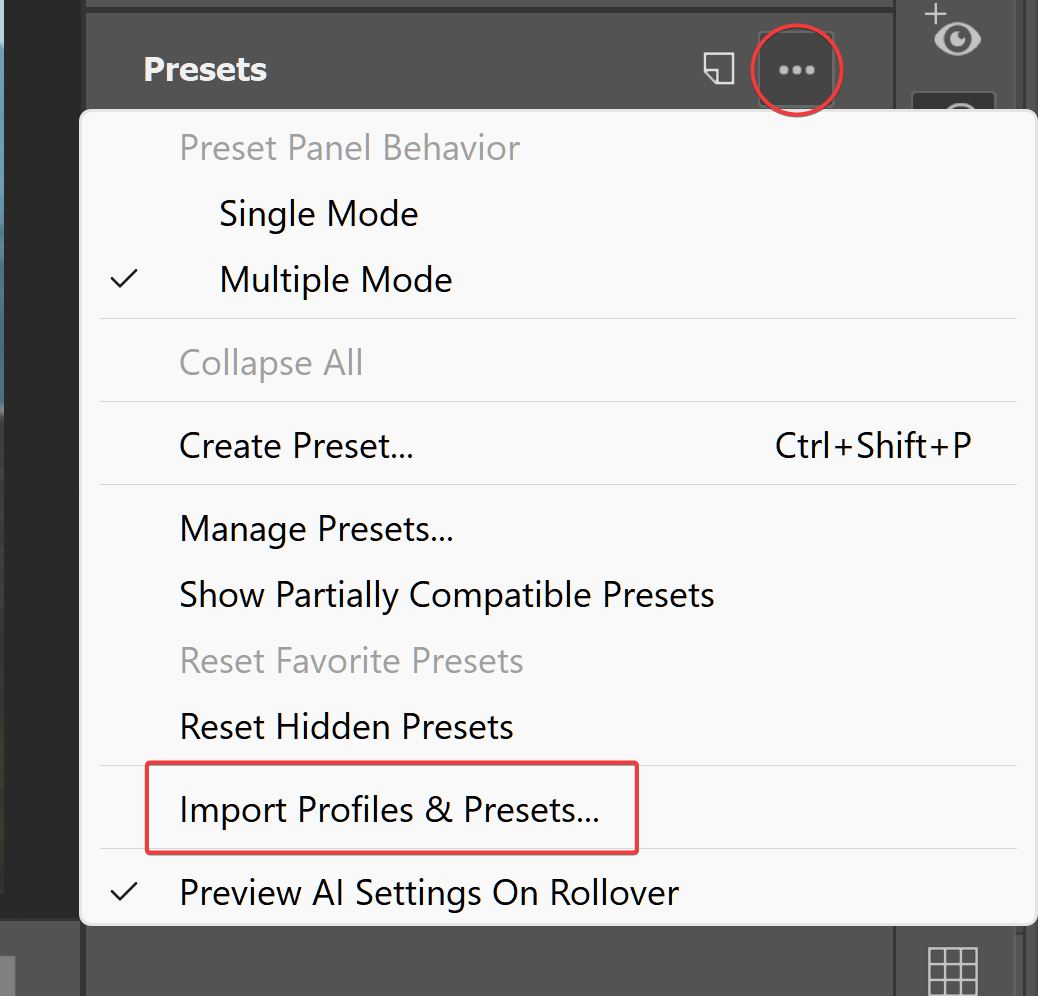
In the Presets panel, click on the three-dot menu and select “Import Profiles and Presets.” Then, browse for and select your .xmp file or a .zip file containing the xmp presets.
Note: There’s no need to extract the zip file.

-
Apply a Preset
Select a preset to apply it to your image.

-
Adjust Preset Amount
Drag the amount slider to make the preset more subtle or stronger.

Tip: Using presets in Photoshop can offer more advanced editing capabilities compared to Lightroom. In Photoshop, you have the ability to combine presets with a wide range of tools and layer features, allowing for greater flexibility and precision in your edits. Learn more about advanced editing techniques in this Photoshop tutorial.


