Import LUTs in Meta Spark Studio to enhance your augmented reality effects with custom color grading. Follow these steps to integrate LUTs into your project seamlessly.
- Download Spark LUT Patch
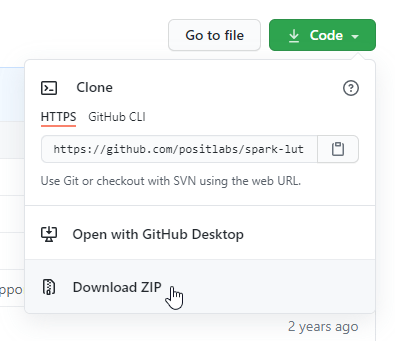
Visit the Spark LUT Patch project page. Download and extract the code to your computer.

- Import the FastColorLUT.arp File
From the Assets panel, click on Add Asset > Import > From Computer. Import the spark-lut-patch-master\patches\FastColorLUT.arp file.

- Open the Patch Editor
Go to View > Show/Hide Patch Editor.

- Add FastColorLUT to the Patch Editor
Drag and drop the FastColorLUT asset to the Patch Editor panel.

- Import a PNG LUT
From the Assets panel, click on Add Asset > Import > From Computer. Import a PNG LUT from the LUTs\PNG or LUTs\Open Broadcaster Software folder.

- Add the LUT to the Patch Editor
Drag and drop the LUT asset to the Patch Editor panel.

- Connect the LUT to FastColorLUT
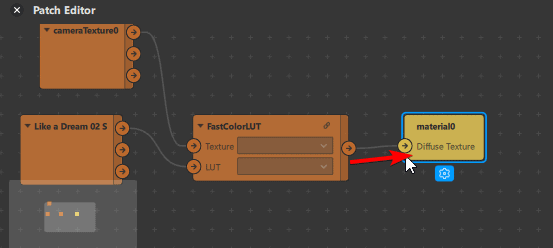
Drag and drop the LUT’s RGBA output to FastColorLUT’s LUT input.

- Add a Canvas Object
Go to Add > 2D Objects > Canvas.

With the newly created canvas0 object selected, go to Add > 2D Objects > Rectangle.


- Resize the Rectangle to Fill Width and Fill Height
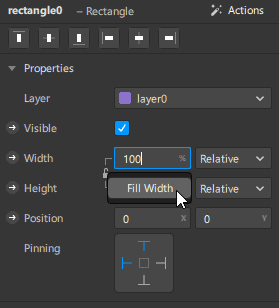
With the rectangle0 object selected, go to the Properties panel and click on the Width setting. Select Fill Width. Repeat this for the Height setting.


- Add a Material to the Rectangle
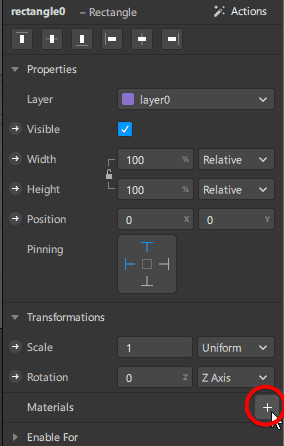
From the same Properties panel, find the Materials section and click on the + icon.

- Add the Material to the Patch Editor
From the Assets panel, select material0.

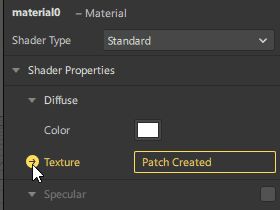
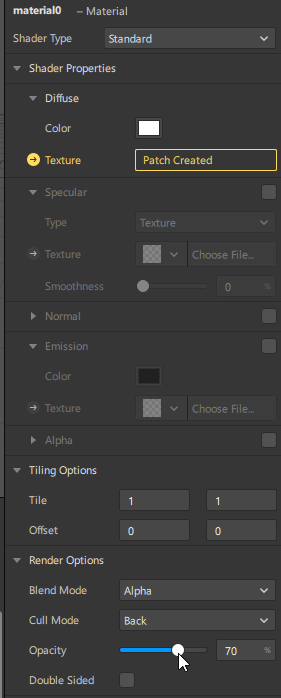
In the Shader Properties > Diffuse section, click on the → button to add it to the Patch Editor.

- Create a Texture Extraction
From the Scene panel, select the Camera. In the Camera panel, add a Texture Extraction.

Drag and drop the cameraTexture0 asset to the Patch Editor. Drag and drop the cameraTexture0 RGBA output to FastColorLUT’s Texture input.

- Connect FastColorLUT to the Rectangle’s Material
In the Patch Editor panel, drag and drop the FastColorLUT output to the material0 input.

The preview should now have the LUT applied.

- Make the LUT Lighter or Stronger
To adjust the LUT opacity, select material0 from the Assets panel. In the Render Options section, adjust the opacity setting.


